Monday 9 December 2013

Rattling Clutch Dismantling

 Taking off the clutch cover.  Remember the starting bolt position
 
 And what order they came out.
 Remove the clutch spring bolts.
 Take out the inner hub.  Unbend the outer hub retaining nut tab.


 Check for lose springs.  My heavier duty springs were slack.
 Check needle roller bearings

 Check inner hub for wear on splines

 And the same on the outer hub

Saturday 16 November 2013

Rattle Won't Go Away

Rattle around the clutch area is still pretty bad after the engine warms up so there are 2 possibilities (well probably more but 2 obvious ones):

1. Cam chain thrashing about - tensioner seized / not working
2. Clutch back plate springs rattling around.

I took the cam chain tensioner off and cleaned it up today. I managed to do it without taking the carbs off. Bit fiddly but it can be done.

The knurled knob on the tensioner was seized so I loosened it off and cleaned the whole thing up - thanks to bwringers tutorial. Put it all back and the noise is still there. At least I have eliminated something.

Next job will be to switch clutches from my other GS1100G project and then get new springs installed on this one.

Saturday 2 November 2013

Quick Tour of the Lowlands

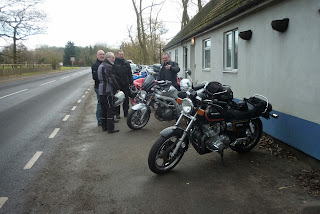
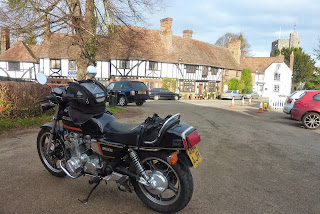
Took her over to the continent (mainland Europe) with some bike mates.  She never missed a beat.


Coming back on the Channel Tunnel train.  Nowhere to sit!

Still Got A Rattle

When the engine is warmed up after a long ride, I get home and the rattle is back.  It goes away when the revs are spun up but returns on idle.  This could, according to the experts, be backplate clutch springs rattling, cam chain rattle (if automatic cam chain tensioner is not working properly) or some other clutch problem. This is what is sounds like:
I'm starting with the cam chain tensioner.  Which means taking the carbs off AGAIN!

Tuesday 22 October 2013

Clutch Check Up and New Springs

I was having slight slippage in the higher gears when cranking open the throttle so I checked out the clutch.  The plates were all within spec but the springs were just on the limit - so I replaced them.
Not sure if he old ones (on the left) were genuine Suzuki parts.  Looks to me like they have more winds on them.  Who cares.  They are toast and new ones are in.

Clutch plates are all in spec (they never seem to wear).


Monday 7 October 2013

Carburettor Synchronisation

Borrowed a set of gauges and did my first ever synch.


No. 1 plug before synching of carbs:

No. 1 plug after syching of carbs:

Tuesday 1 October 2013

The Bike Passes MOT (Testing)

I took the bike to be tested today at Robinsons and it passed with no advisories (nothing even slightly wrong with it).  This is course doesn't mean it won't fall apart tomorrow but for today with a new tyre fitted to the front, we are now street legal.  So I went for a spin:


Tuesday 24 September 2013

Exhaust Bolt Holes Dilemma

You might have seen earlier in the blog, that the PO of this bike had used 2 or 3 different types and lengths of bolts to secure the 4 - 1 exhaust.  It seems that the securing flanges on this exhaust are wider than the originals and in order to get a good fixing, some longer bolts and different numbers of washes were used.  This is what I found:
Securing flanges:

Also there was only one exhaust gasket which was located on the no.4 cylinder.

But I also found that when I took off the headers, although all the bolt holes had the same depth, some of the bolt holes would only allow a bolt to be screwed in 6 turns, whereas other holes allowed up to 14 turns.  So this was the first hole (6 turns only until it was tight):
 And this was another bolt hole that allowed 14 turns.  You can see the same bolt beds in a lot further:
So I was thinking (since the hole depths were the same) there must be something wrong with the threads.  I tried to tap it out.  It was very stiff and I only managed 3 or 4 turns and all this came out:
I don't want to continue this exercise for fear of damaging the bolt holes completely.  Should I keep tapping it in?   

Monday 23 September 2013

First Test Ride (30 Miles)

Been a long time since I rode my own bike (maybe 20 years) but I have ridden a few belonging to other people very briefly.

I was suspicious of my new brakes and if I had bled them correctly but all seemed well after a few miles although it would be very hard to lock the back brake and impossible to lock the front one in dry conditions.

The motor ran pretty good (especially after I switched to reserve!) but not as sweet as I seem to remember they are capable of being.

When I got back I decided to take off the exhaust pipes to see if I could fix the "blowing" problem on no.4 and to see about these different length exhaust bolts.


No.1
No.2
No. 3

No. 4
It's no. 1 that sooting up and look at this video of it running without the headers.  See no. 1 spit fire at me right at the end:


Saturday 14 September 2013

More New Parts

Just when you thought you were nearly there; you need some more parts.  More brake parts arrived at Robinsons today.

Not So Good Rear Brake Torque Arm Bolt

Checking over the rear brake as I was putting it back together and I looked to me like the PO had substituted a different kind of bolt on the caliper torque arm.  I am not engineer but even I understand that this bolt is going to be subject to a significant amount of shear under full braking.  Would you trust a regular bolt from a hardware store?  No neither would I.  So I stole the bolt from my other GS1100 project and bought a new one to put on that one.

 The one on the right is more likely to hold - don't you think?